
Video conferences and video calls are a daily part of modern life. Whether personal or corporate, it’s quite common to appear on screen at some point during the day. Depending on your role, you may also make recorded appearances for podcasts, YouTube videos, or even TV.
Here are a few simple tips to help you setup your tech so that you look your best.
What am I looking at?
You open up your laptop, join the call, start you camera, and recoil in shock as you chin(s) look giantic. It’s not you (unless you’re me, then it’s me and my chins), it’s the angle of your webcam.
While most webcams have are angled slightly upward, the field of view is still mainly straight ahead. When rest on a desk or conference table, this means the lens is pointed at your chest. Your head is usually in the top 1/3 of the frame and it’s being viewed from underneath.
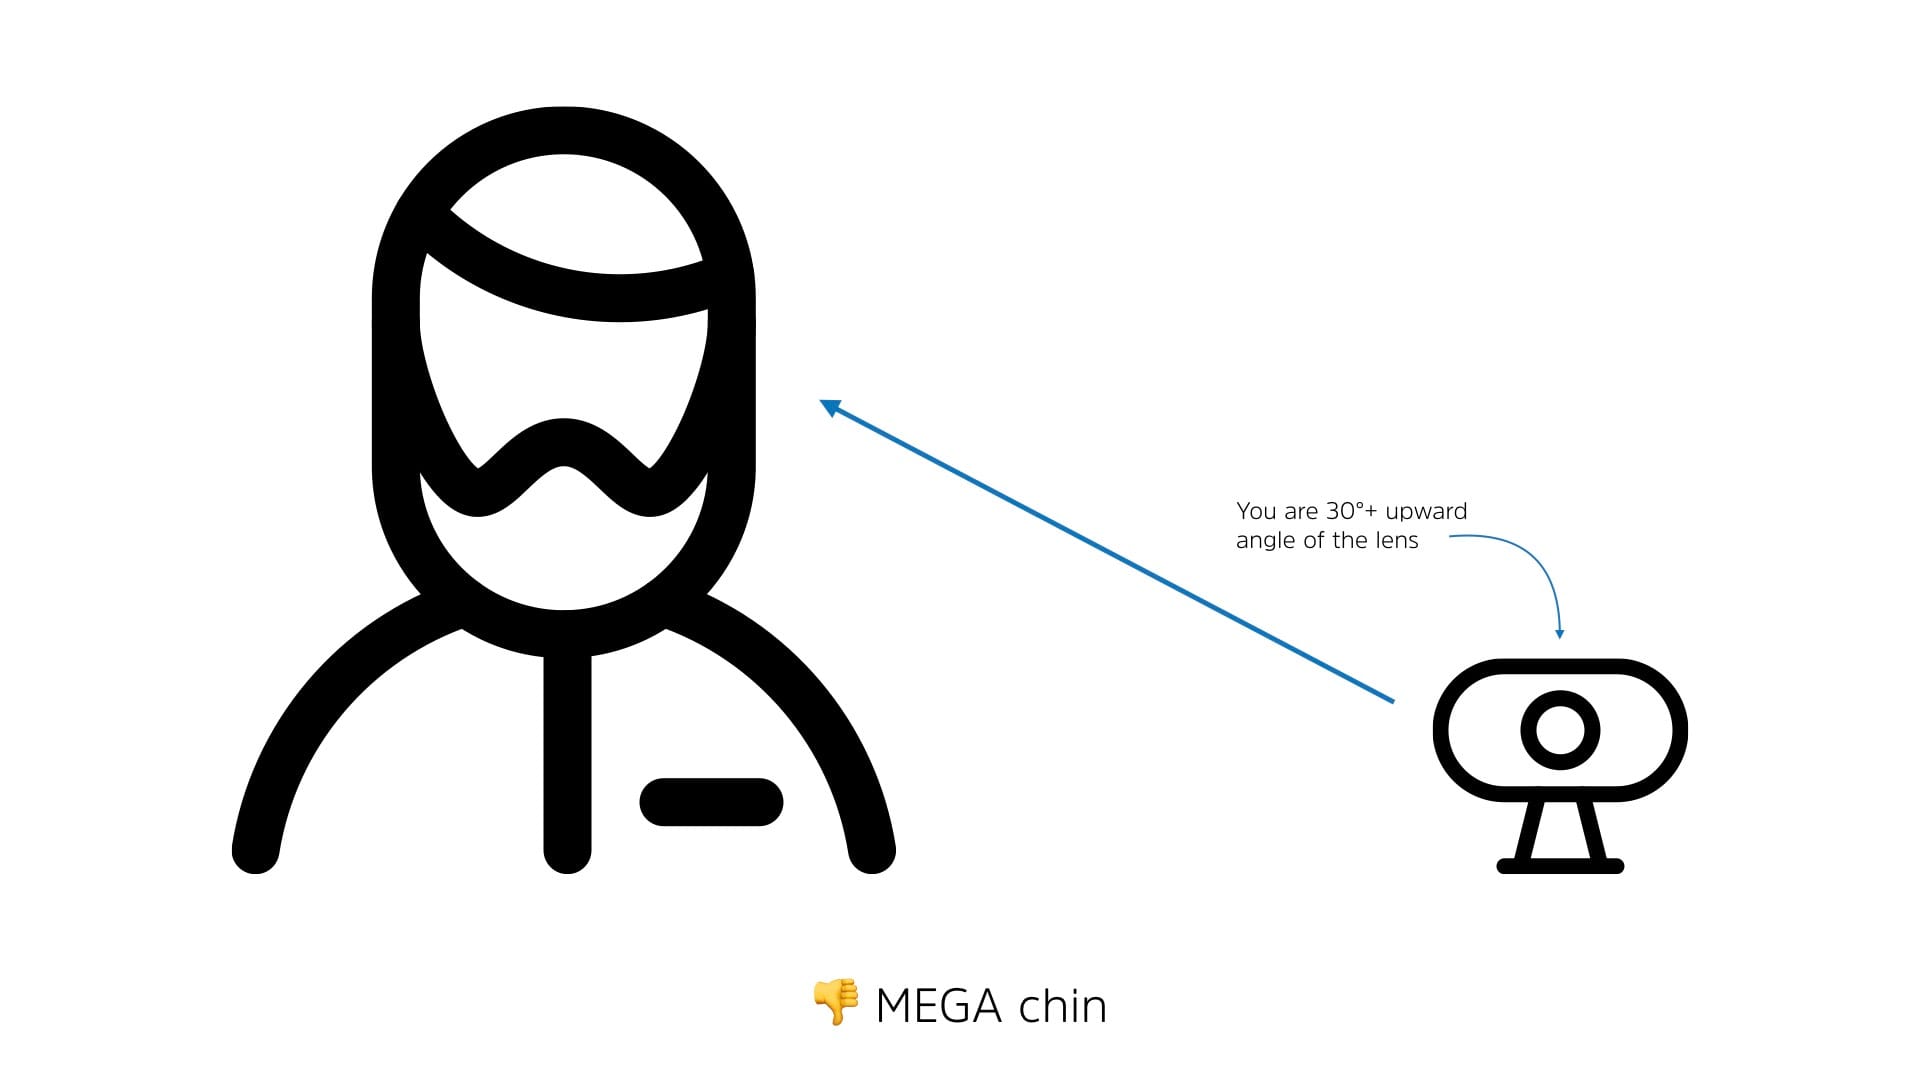
Unless you’re extremely, extremely tall, that’s just not how the face-to-face interaction works. So why are you trying to make your video call work that way?
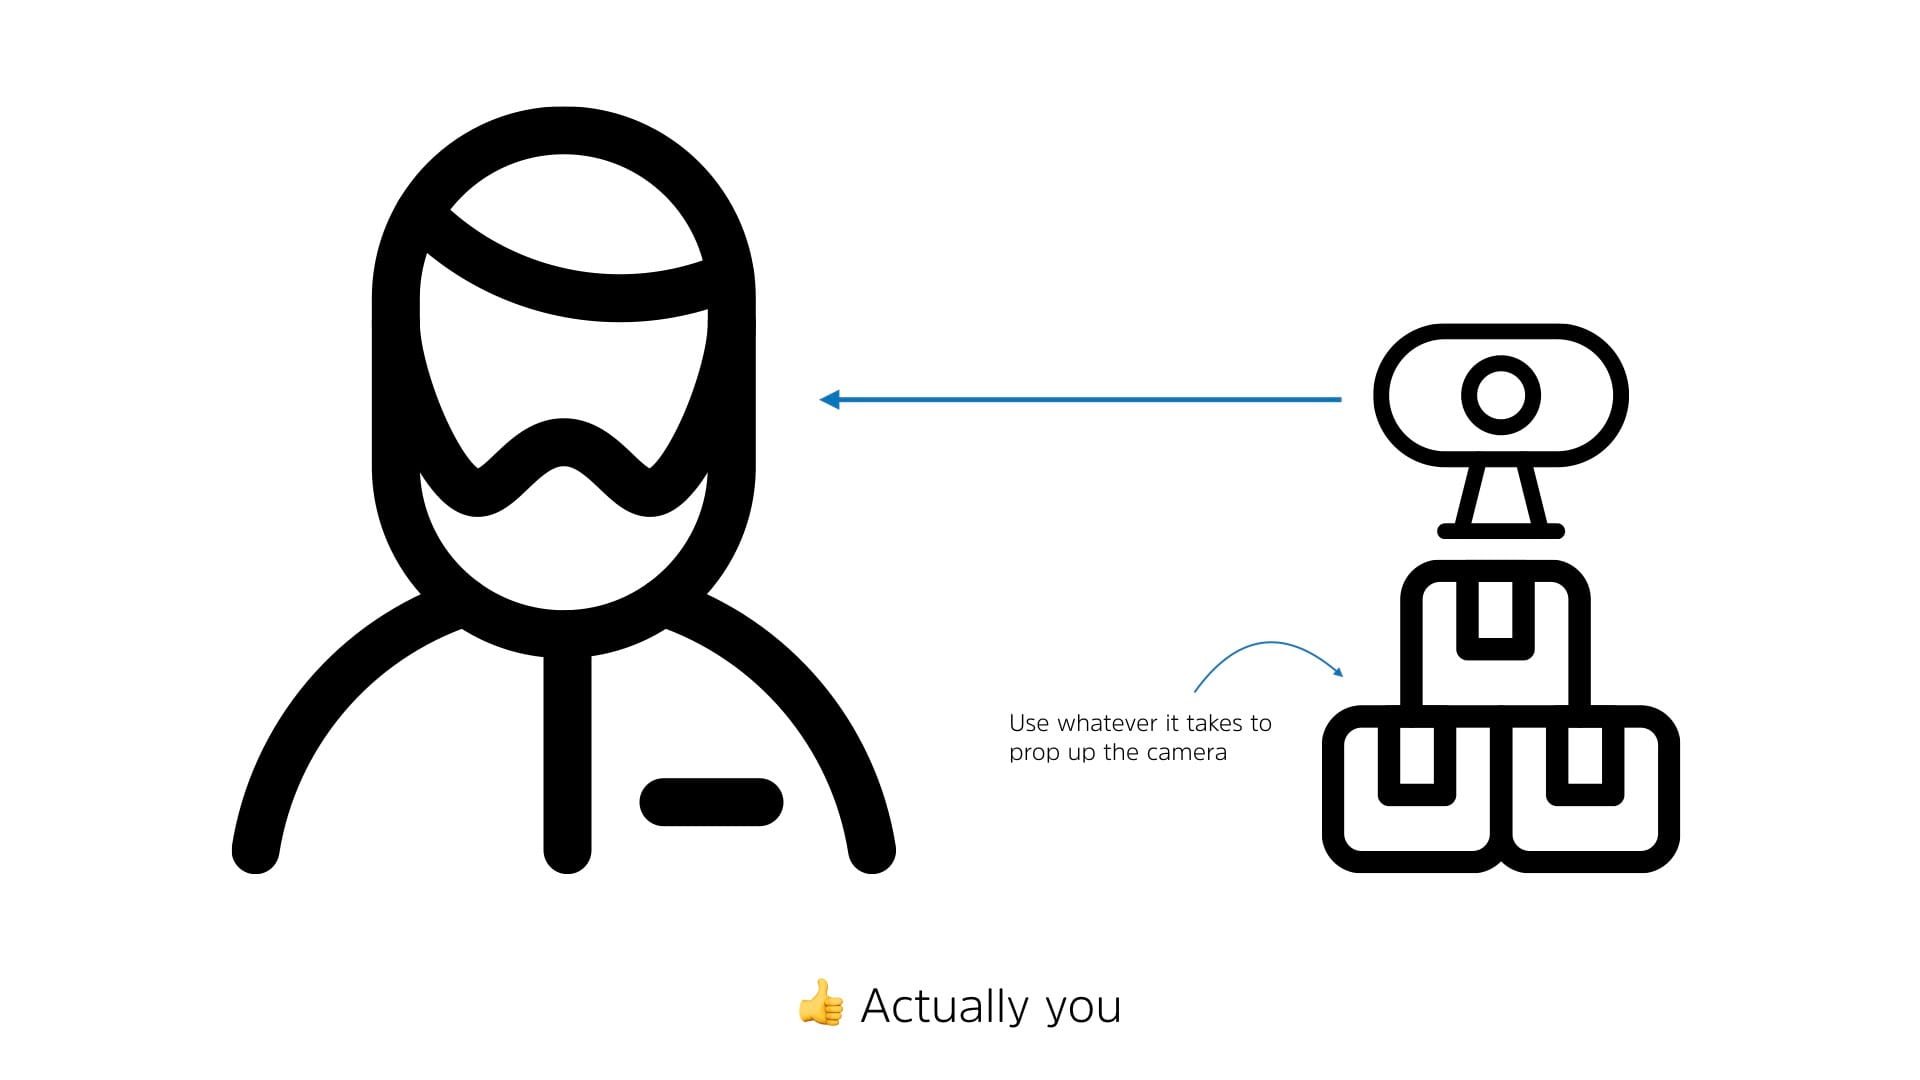
This doesn’t have to be a permanent solution as it will most likely make typing on your laptop awkward. If you think it’ll interfere with using your laptop during the meeting, I would challenge you with, “Should you be in that meeting if you aren’t listening and contributing?”.
No need to get fancy with your solution here. A pile of boxes or books will work well. Just make sure your laptop has a stable platform to sit on. If you’re using a standalone webcam, you may need a USB extension and a small tripod wouldn’t hurt. Those webcams tend to be very light and may have trouble sitting steady.
Why are you looking over there?
With the camera at eye level, now it’s time to pay attention to where you are looking.
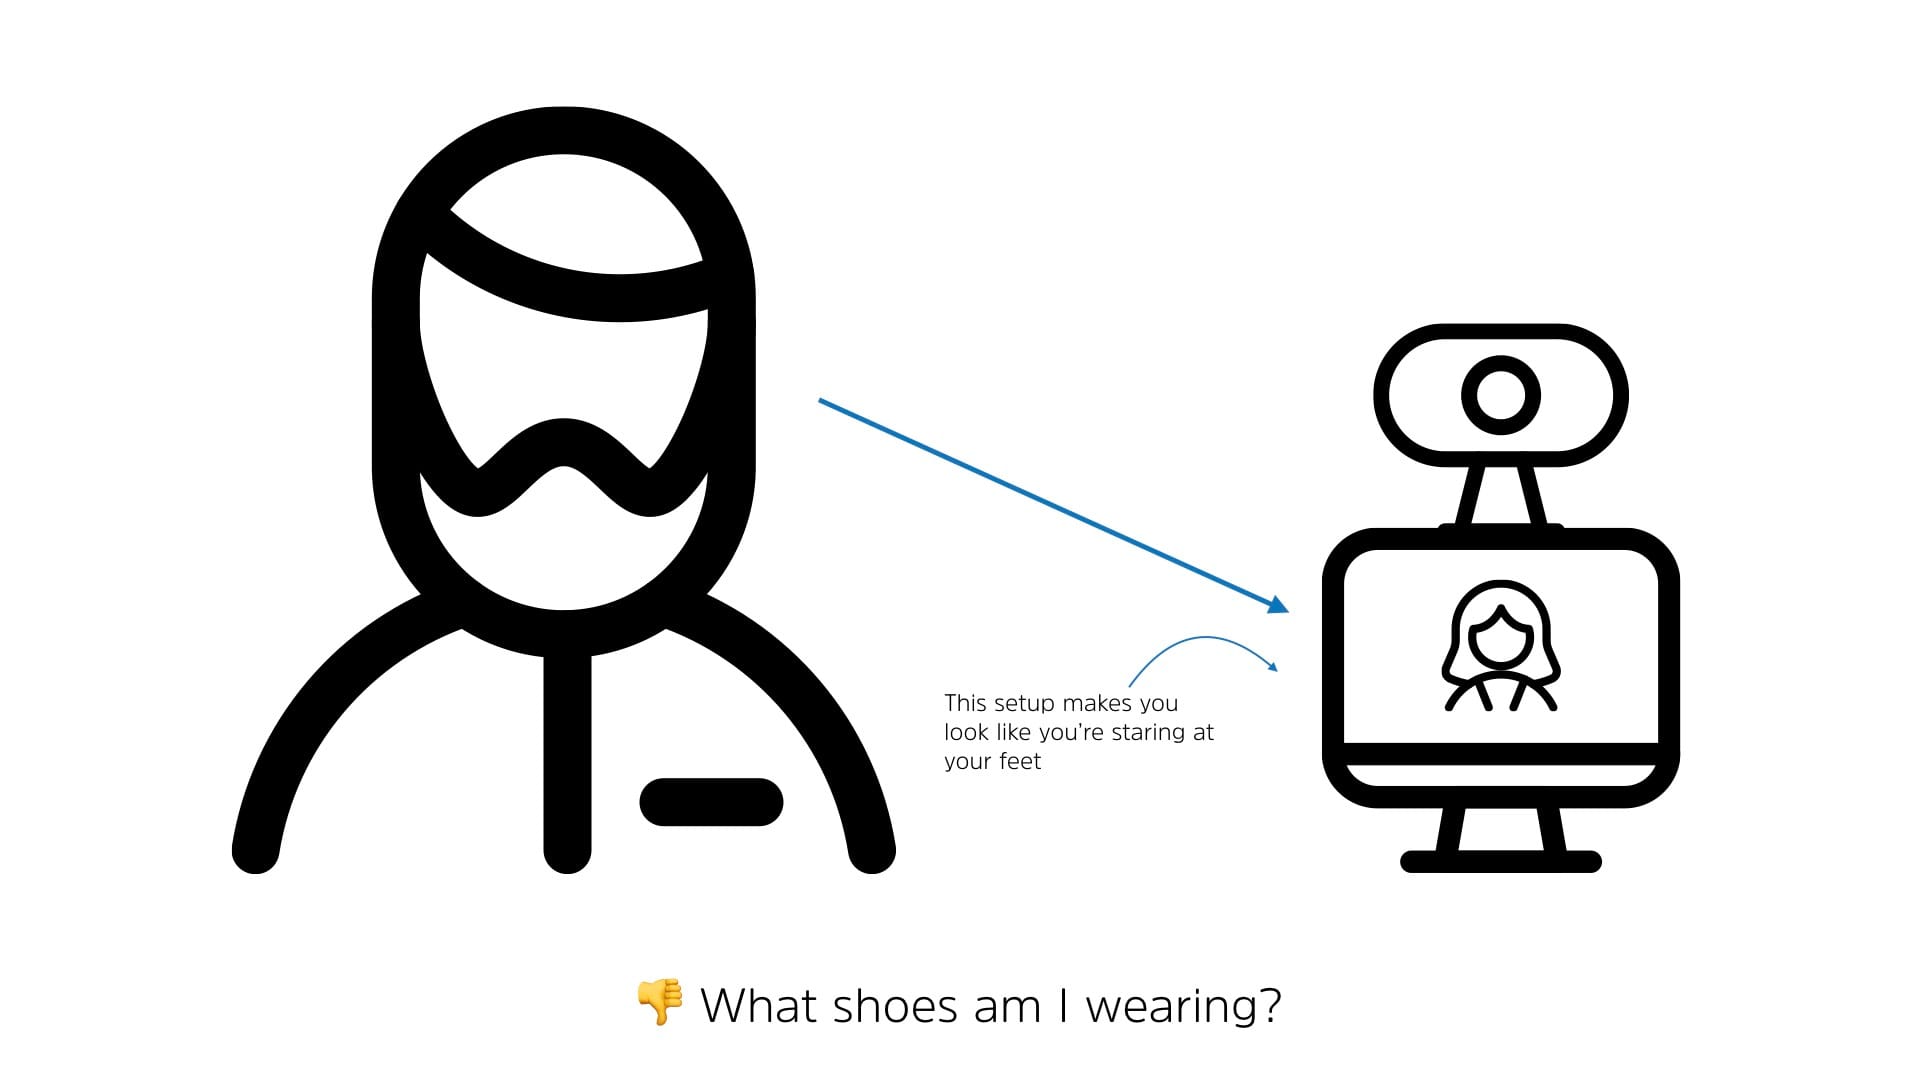
It’s only natural to default to looking at the other end of the video call or conference on the screen. That’s where the information is after all! But this leads to really odd effect for the people looking at you, you appear to be looking at your feet or off into the distance depending on the screen placement.
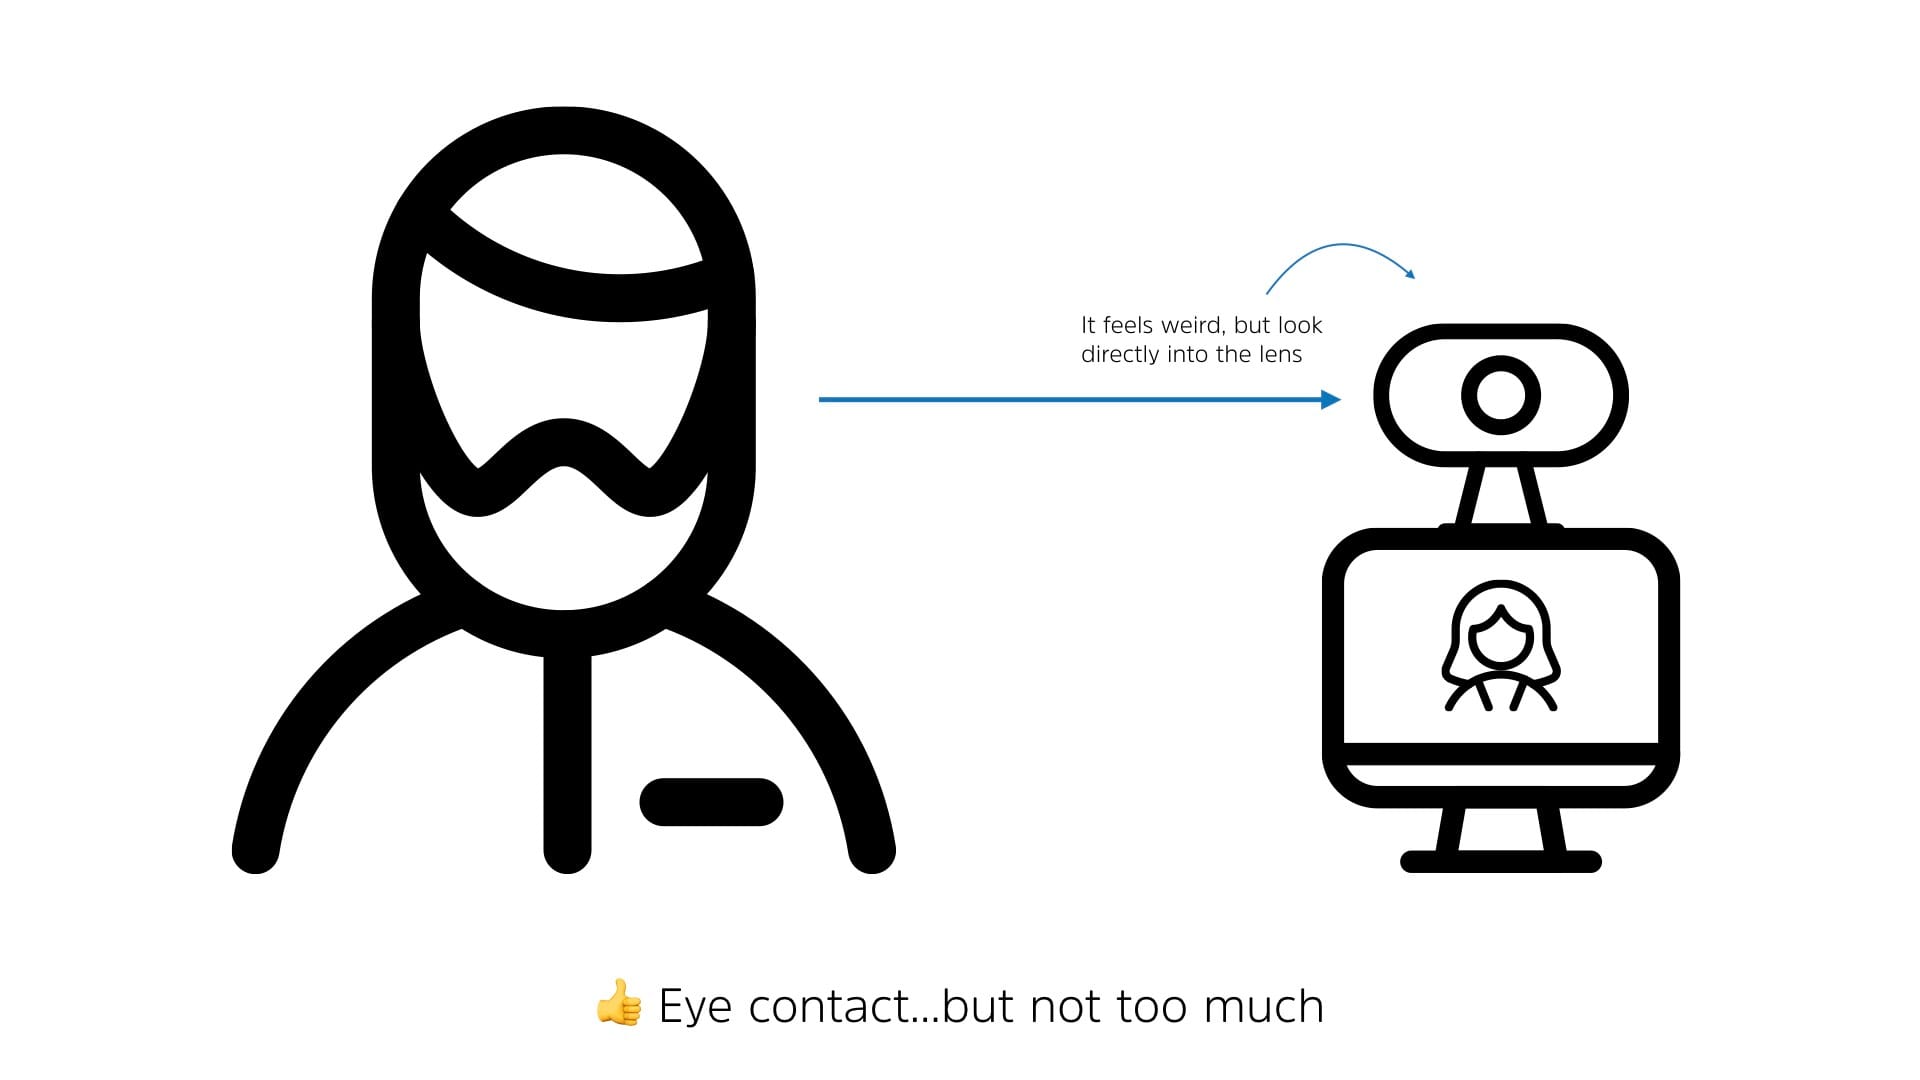
This technique is useful for when you are speaking if you are not speaking, you can look at your display in order to view the contact that other people on the call are sharing.
If this is a video appearance such as a recorded podcast or TV remote, you should continue to look at the camera lens throughout. Brief glimpses to the side or you know, blinking, is fine but looking “right down the barrel” indicates that you’re engaged and engaging.
Clean up your background
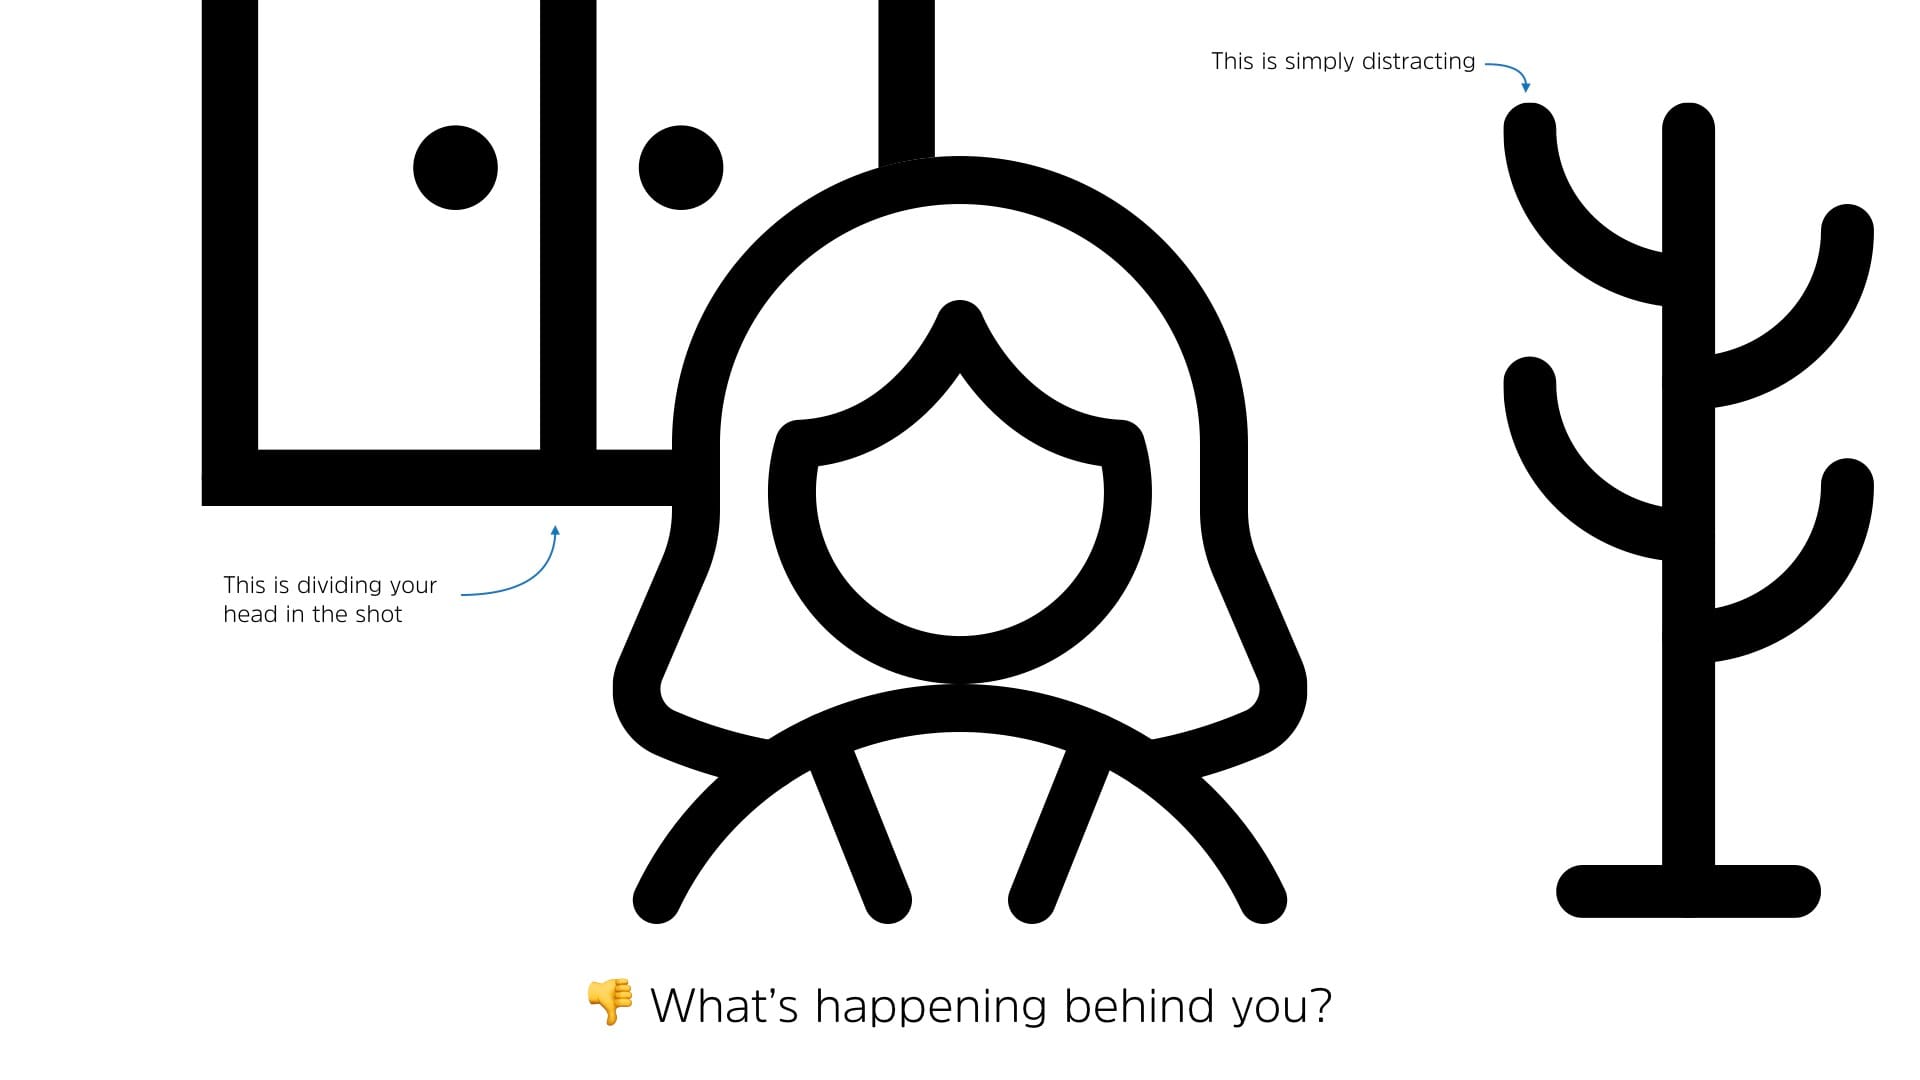
With the camera angle and your eye line all set, it’s time to look behind you. A little attention to your background will go a long way. What you’re looking for is furniture, paintings, curtains, decorations, etc., really anything that draws attention away from you.
The goal is a clean, simple background. There are three ways to achieve this:
- Change the background (a/k/a move things around)
- Move your position
- Move the position of the camera (including getting closer)
Any of these three or any combination of these three tehcniques should allow you to create a clean background.
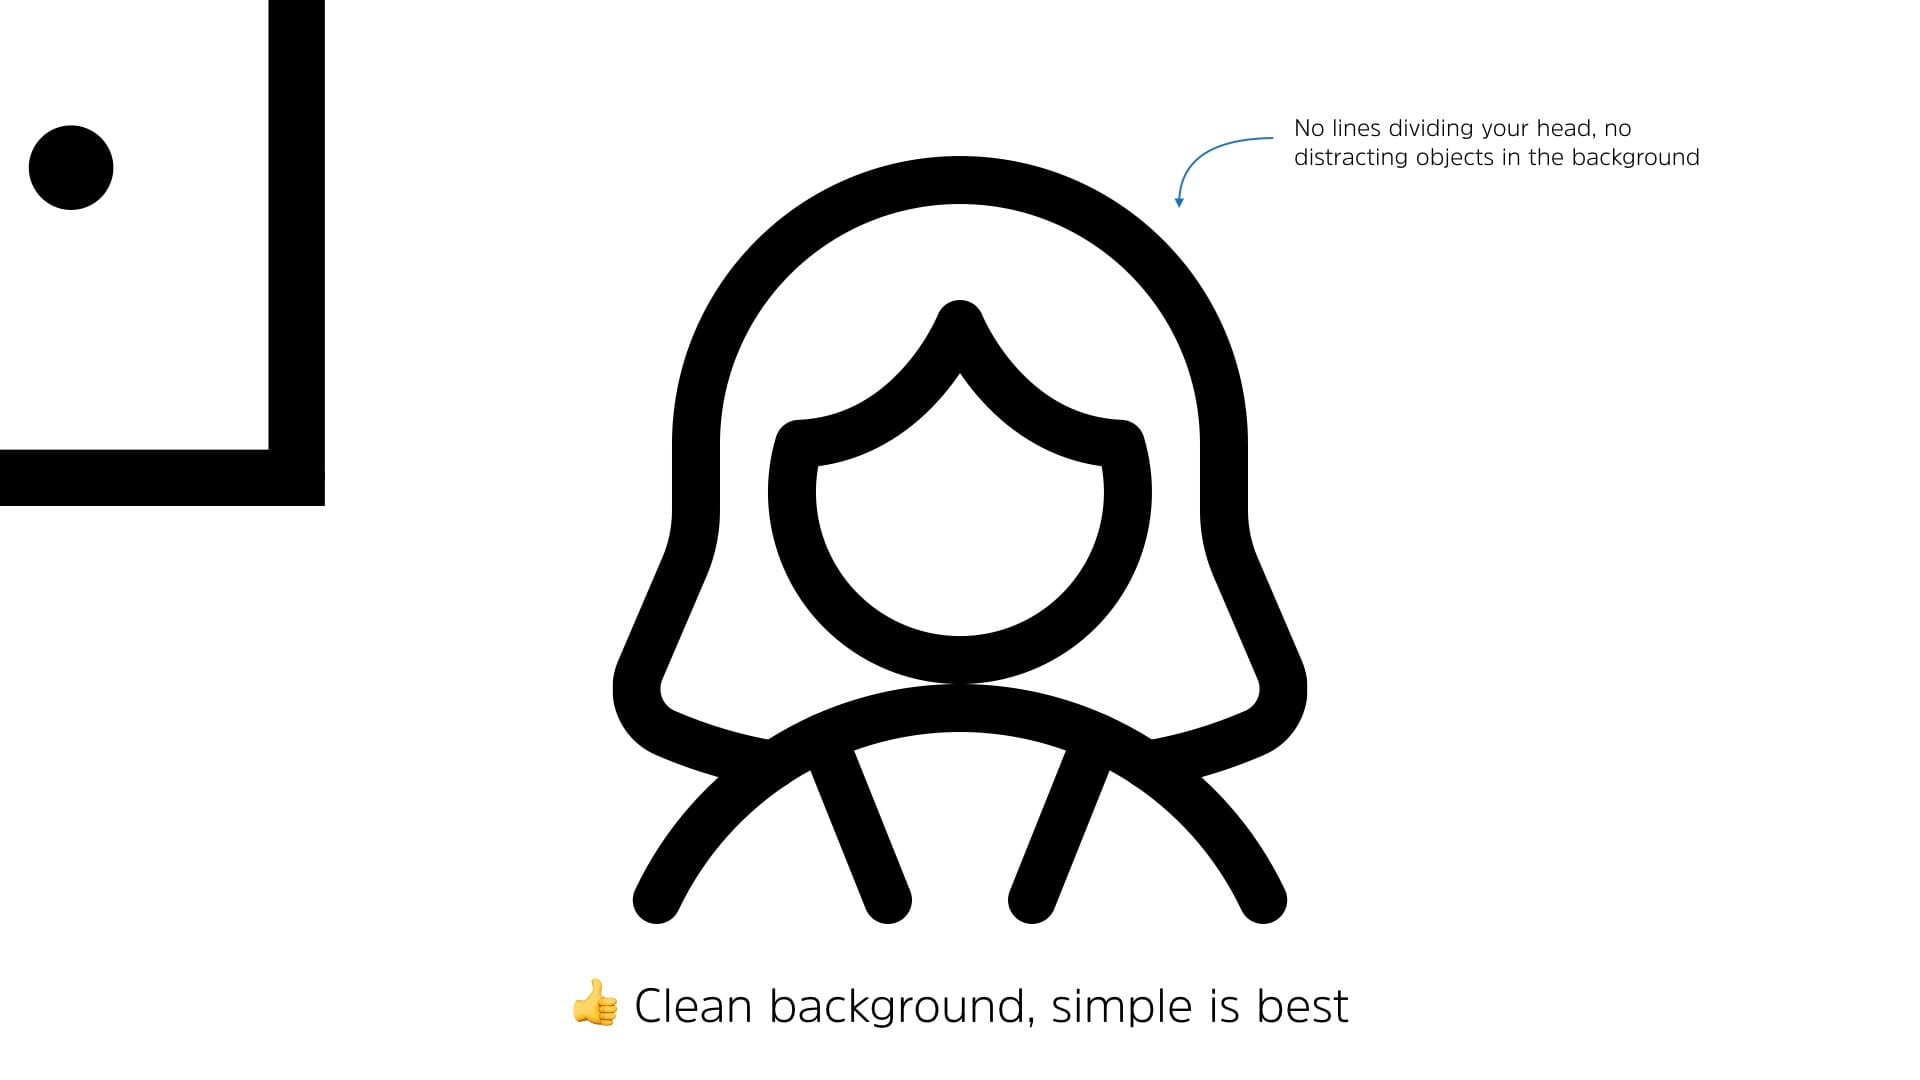
When the background is too busy or a line seems to continue through your head, it can be very distracting for viewers. Use your selfie camera to clean up the background and make sure that it compliments you or at the very least..fades into the background.
Lighting is critical
The next step is to check your lighting. It’s a nuanced subject but the basics for lighting are very simple.
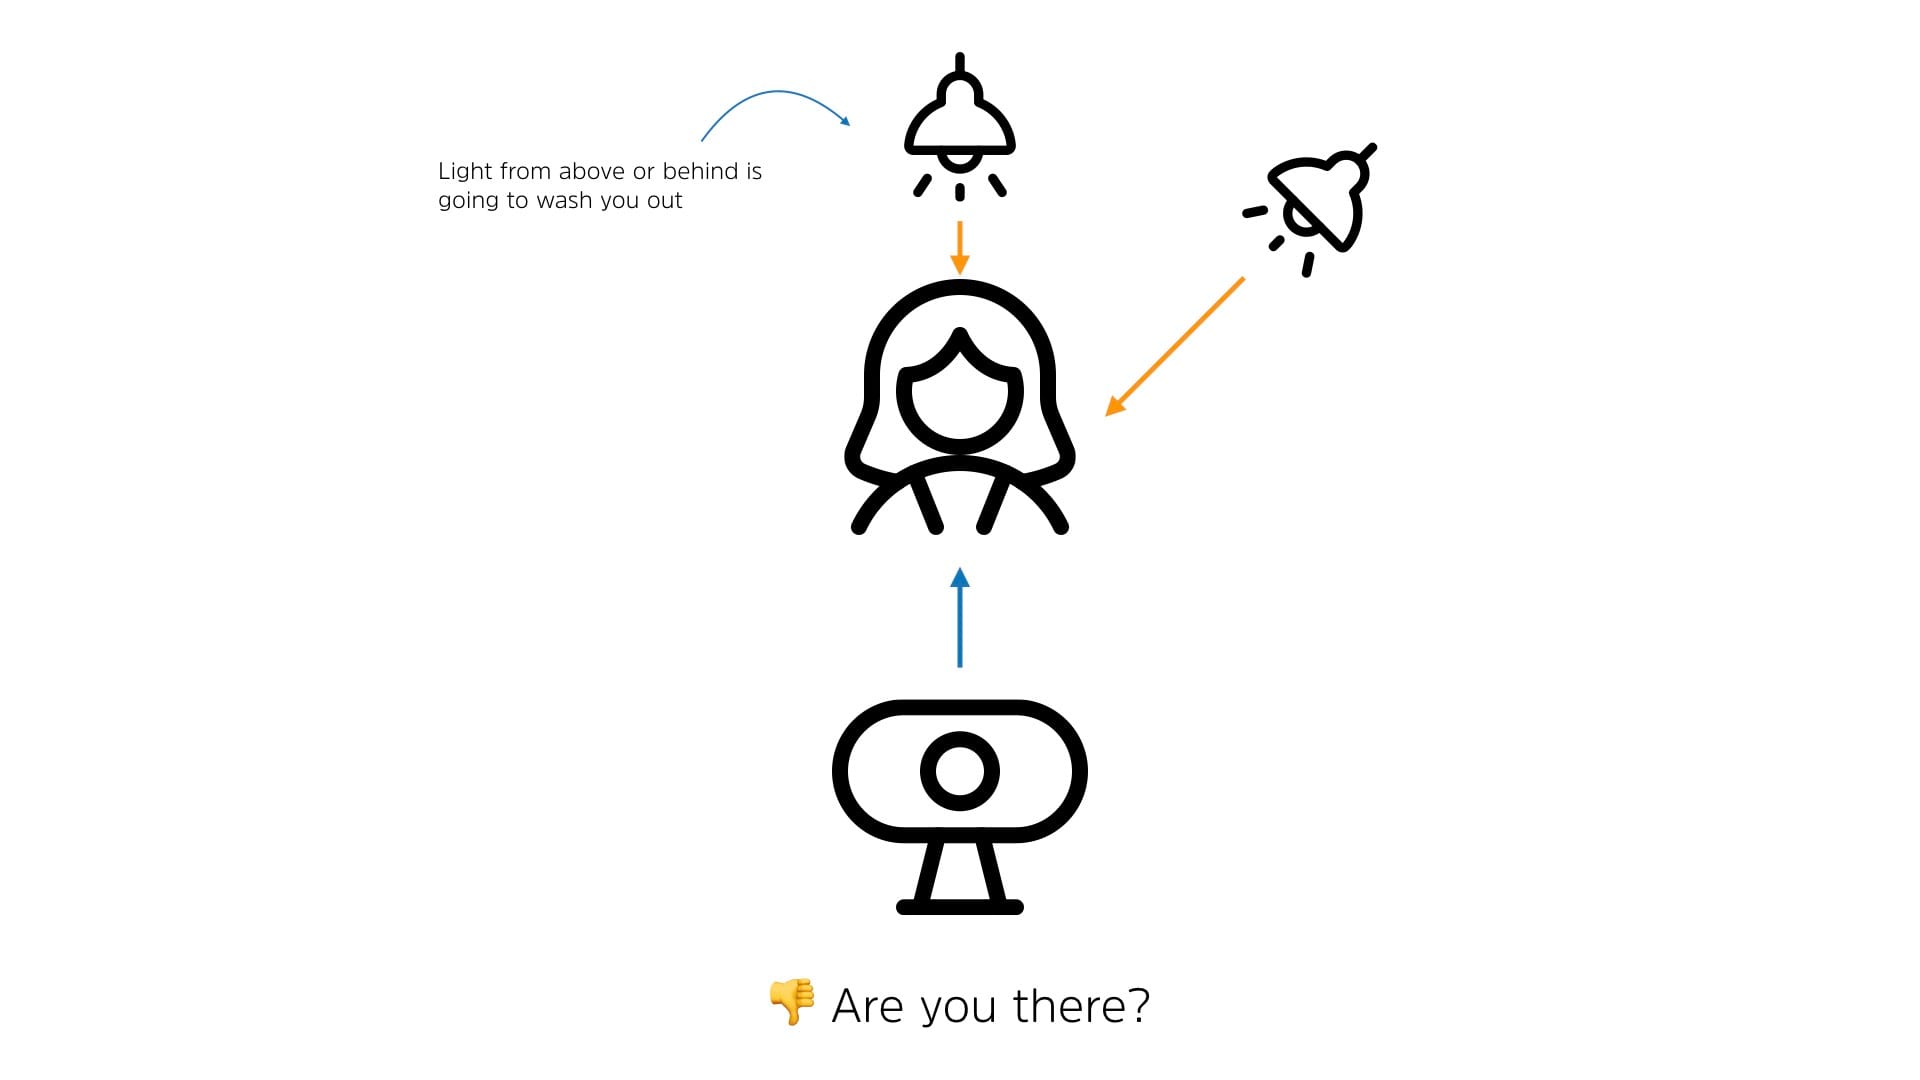
If the primary light source is behind you or above you, that’s bad. The light will be picked up by the camera and you’ll be washed out. If you’ve ever seen the “shadow people” on the conference call, this is what’s happening. Sadly, lighting in offices is typically quite poor for video, so you’re going to have to put in a little work to make your shot look good.
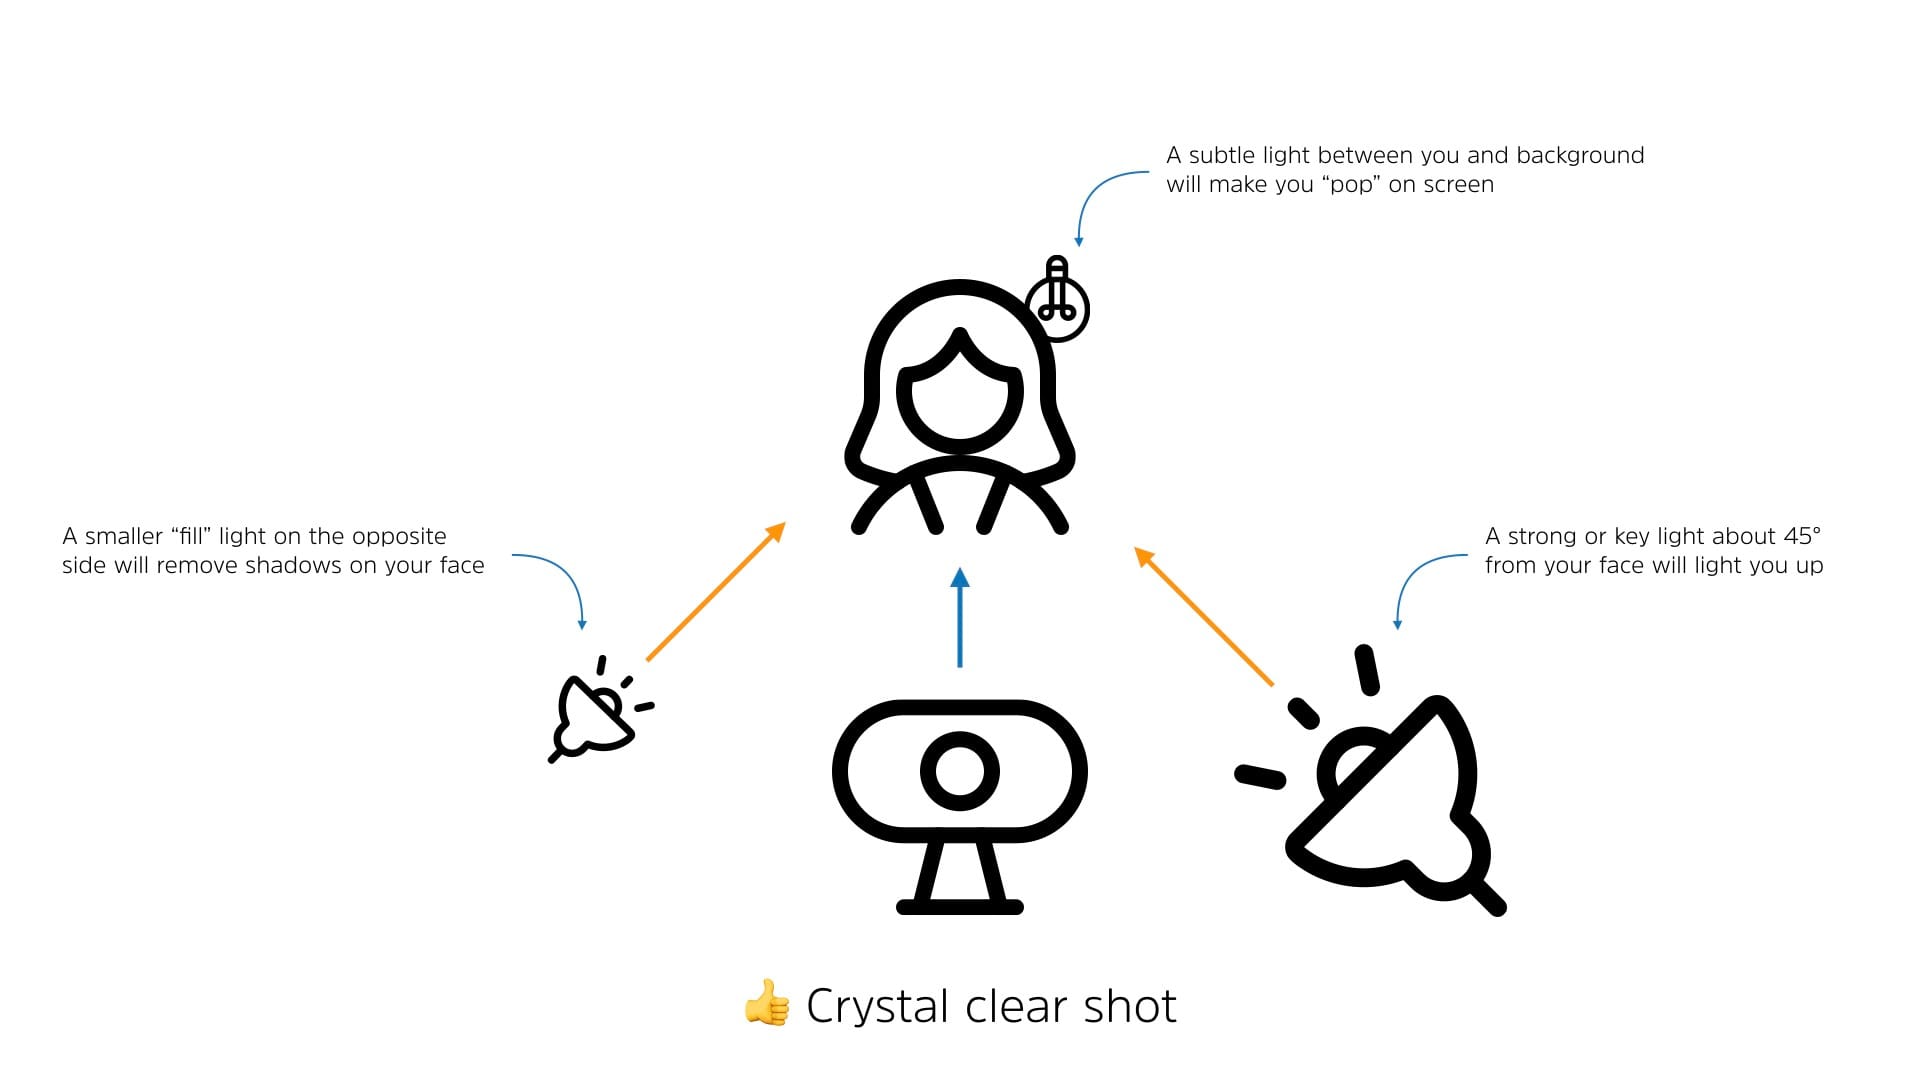
You want a strong light (the key light) about 45 degrees from one side of your face. Ideally, you add a weaker light (the fill light)on the opposite side. Finally, a subtle light between you and the background will make sure that you pop. These light sources can be a lamp, video light, window with natural light, anything that puts out some lumens.
Lighting goes a long way to make a shot look good. In fact, good lighting can make a reasonable camera shot look extremely high end. Play around with your setup and consider spending a little money on a light.
I usually carry a pair of the Aputure Amaran AL-M9 in my travel bag to help with lighting when I’m on the go. For $45 USD each, it’s a small investment that has a major impact of video shots in hotel rooms or in conference hallways.
Can you hear me now?
Finally we turn to audio. Understanding what microphone you have and how it works. Again, this is an area where a little investment will have a major payoff.
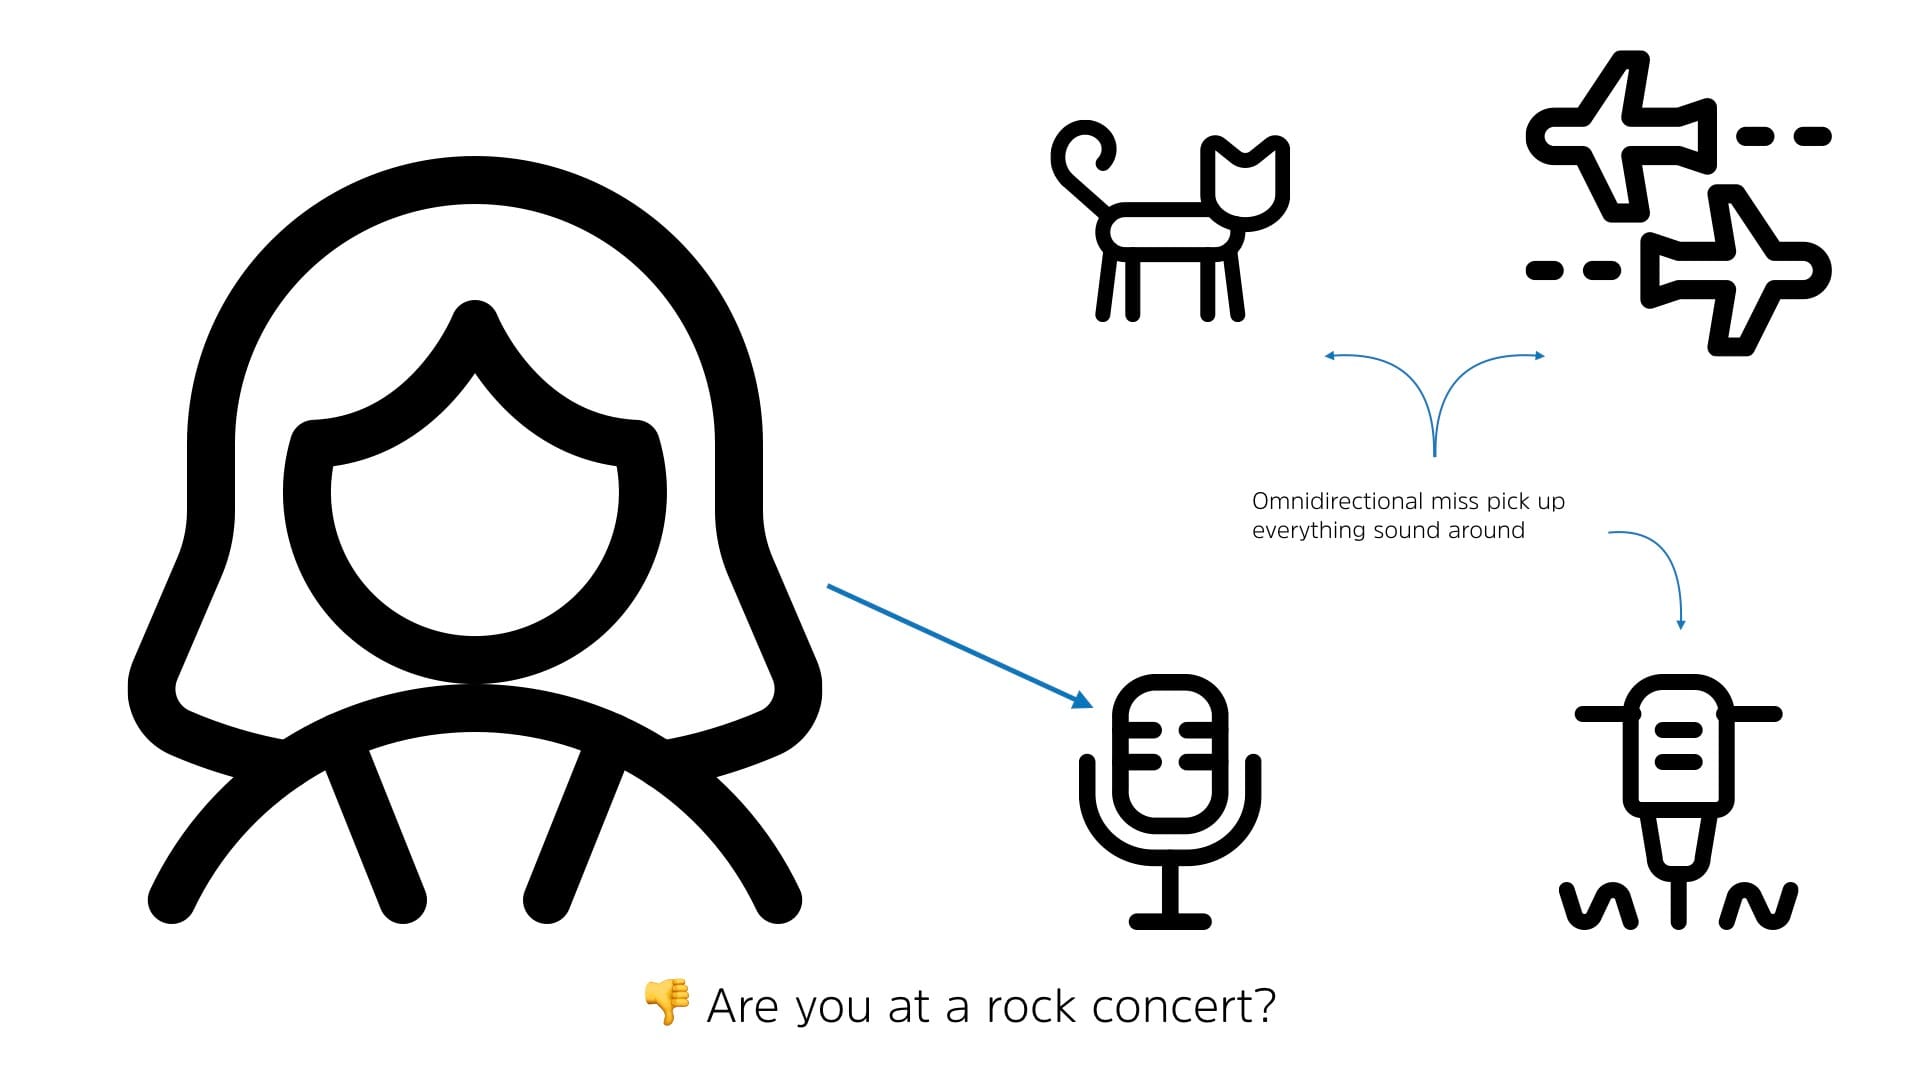
Most webcam and laptop microphone are omnidirectional. This means they take in audio from all directions. While that makes sense for most use cases, that also causes a lot of problems when you’re trying to get clean audio.
Omnidirectional mics will pull in any audio in the room. Fans, noisy lights, room noise, street noise, and noise from the offices around you are all going to be heard.
That’s bad.
To help clean up the audio, try to quiet down the room noise. Turn off fans, close the door to the room, and generally try to stop loud things from being loud. Remember hard surfaces bound sound waves and are generally poor for audio quality.
If you have the funds, purchasing a directional or higher quality microphone will make a world of difference. The best place to start is usually with a shotgun microphone or studio microphone.
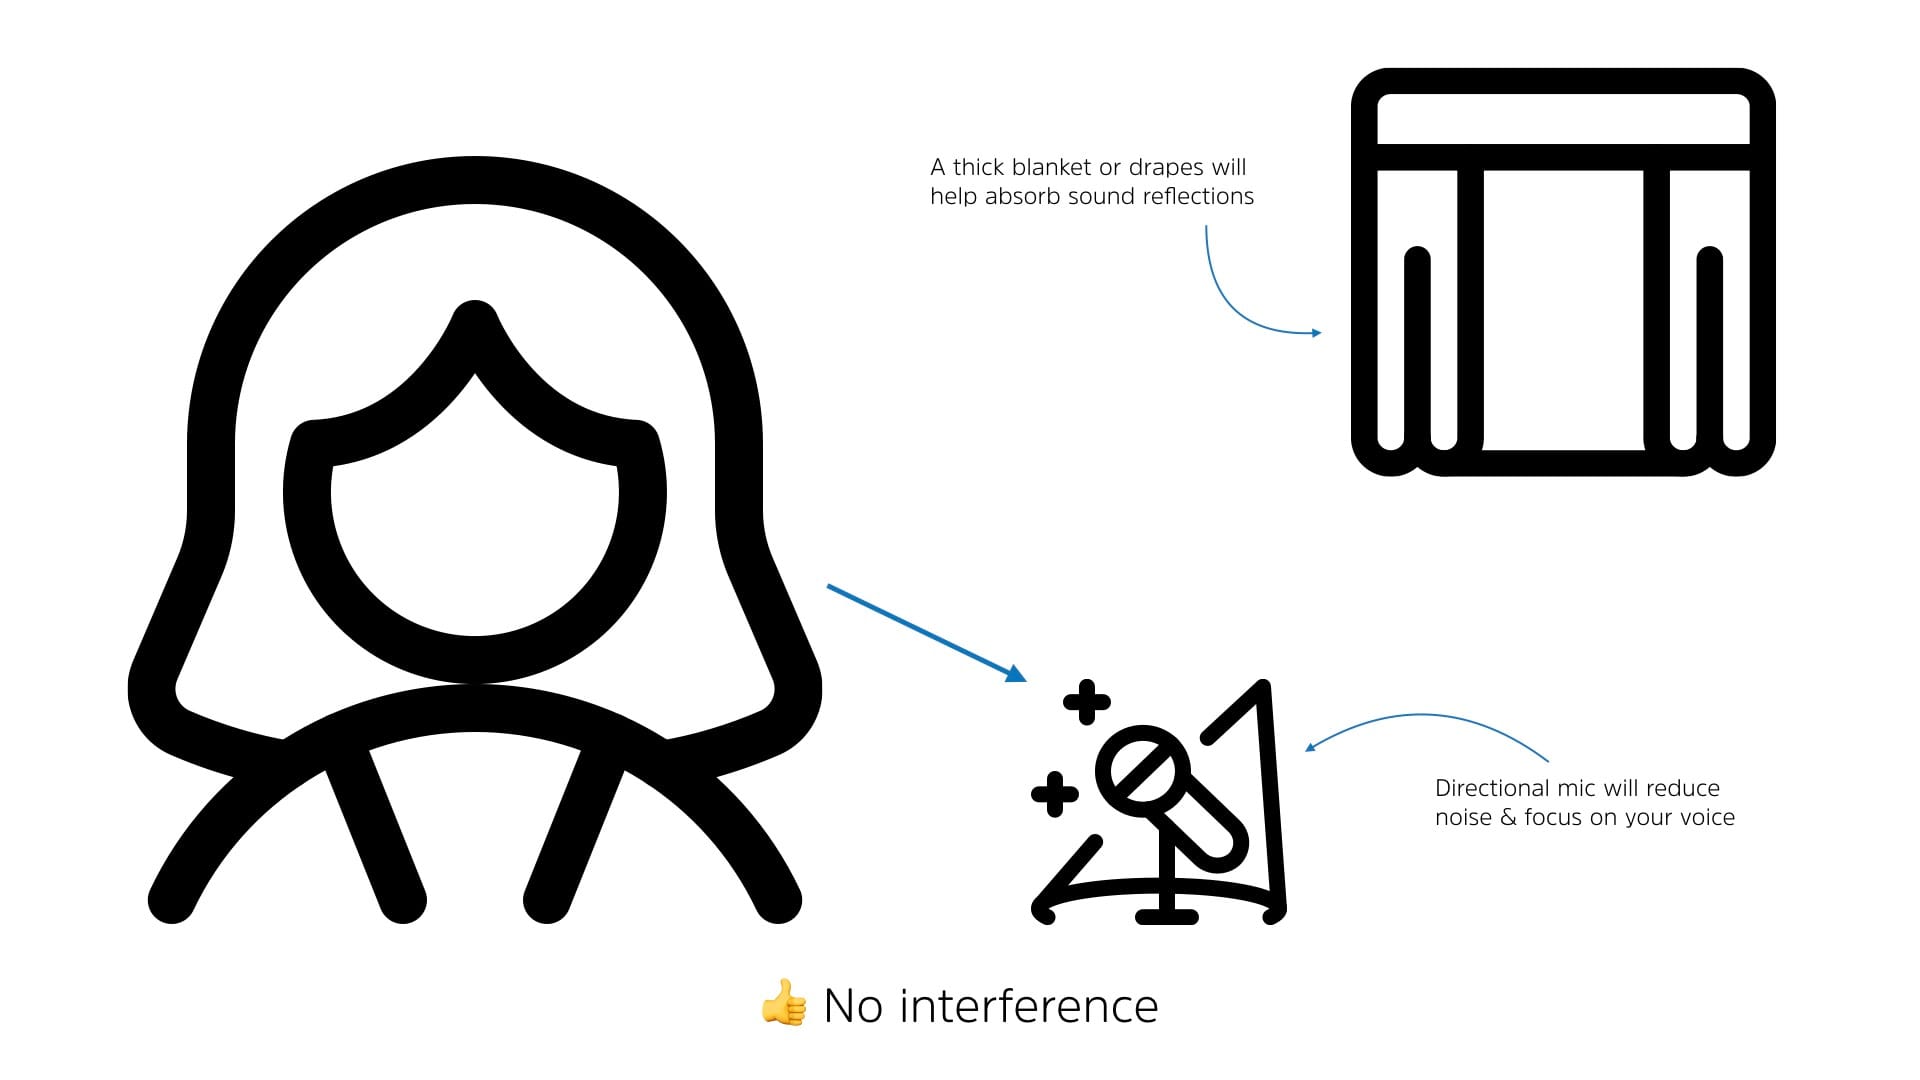
A higher quality, direciton microphone will reduce the background noise and provide a much cleaner, clearer sound. If you’re in a room with a lot of hard surfaces (empty walls, hardwood floors, etc.), using a thick blanket on the floor or hanging out of frame can help dampen the noise as well.
Investing in something like the Blue Yeti X ($170 USD) will take your audio to the next level.
5 simple steps
You can spend a ton of money to upgrade you setup to a professional studio but with a few quick tips, even a moderate investment will take your video appearances to a whole new level.
Remember;
- Get the camera level with your head
- Look directly into the lens
- Clean up your background
- Adjust your lighting
- Direct your audio
With these five simple steps, you’ll be the star of the show…or at least the conference call.


